Spray paints are generally effective when the bike is rusty, scratched, or dented. Sadly, they often suffer runs and dips, and their cleanup is laborious. For those reasons, I’ll show you how to paint a bike without spray paint.
First, disassemble, sand, and clean your bike frame. Then set up your workstation and bike. After that, apply a primer first and then three layers of the paint before leaving your bike to dry.
I’ll take you through the process in detail to help you paint your bike at home like a real pro. My goal is to help you do it without spray paint.
Now, let’s get into the ten steps.

10 Steps On How To Paint A Bike Without Spray Paint
Now here are the ten steps for painting a bike without spray paint.
Step 1 – Find a Spray Paint Alternative
Since spray paint is out of the picture, consider any of these two options.
a) Carbon Touch-Up Paint and Primer
Given that most bike frames are made of carbon fiber, steel, or aluminum, you can use carbon touch-up paint to cover minor dents and scratches.
You have to ensure that the paint sticks well. For that to happen, you need to use a primer (the undercoat). I’ll touch on the primer in step 7.
For now, let me recommend a carbon touch-up paint that I fancy for painting metal surfaces.
I’m talking about the ACDelco GM Carbon Flash WA501Q.
This carbon touch-up paint fixes both minor and larger dents and scratches on the bike. Overall, the touch-up paint promises the perfect frame finish.
b) Direct-to-Metal Paint
If you don’t like having to buy a primer and paint, get direct-to-metal (DTM) paint.
I recommend the POR-15 46804 Top Coat Gloss White Paint here for its outstanding qualities. This DTM paint comes with rust-preventative properties and is U.V-resistant.
So, not only does it withstand wetness but also the sun’s extreme UV.
It comes in various finishes, such as gloss white to chassis black to give your bike the glossiest finish.
Step 2 – Bike Disassembly
Since what you are painting is the frame, you’ve to remove the attachments and put them aside. That includes the wheels, derailleurs, handlebars, and water cage.
Also, remove the decals and stickers from the bike frame.
Remember, however, that you don’t have to remove everything if you don’t want to. You have the option of covering what you want to protect from the paint, as I explain in step 4.
Step 3 – Frame Clean-up and Sanding
The next step is to sand the bike frame. But before you do that, wipe it to remove glue residues from the stickers and decals.
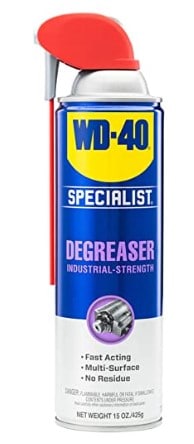
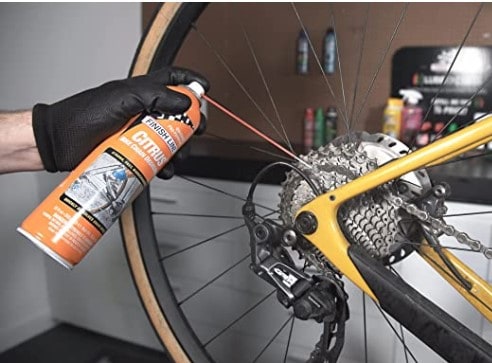
You can do this by spraying a WD-40 Degreaser and then wipe the frame with a piece of cloth. Once the bike frame is clean, sand it using high-grit sandpaper.

After that, you have to wipe off the sanding granules. You, however, don’t need a degreaser here, as a piece of damp cloth will do.
So, use a wet cloth, preferably with soap, to clean the frame before leaving it to dry.
Step 4 – Bike Covering
Now that the frame is clean and dry, it’s time to cover the areas you won’t be painting.
To do that, consider using weatherproof painter’s tape to protect the parts from the paint and the harsh weather when you leave the bike outdoors to dry.
Step 5 – Work Station Preparation
Before you can start painting, prepare your workspace. Preferably, set the station outside where there is the free flow of air.
But if you cannot work outdoors, ensure your indoor space is well ventilated, preferably a garage space with an open door or large window.
And to ensure you don’t mess up the floor with the paint, lay down old newspapers or a tarp.
Step 6 – Bike Setup
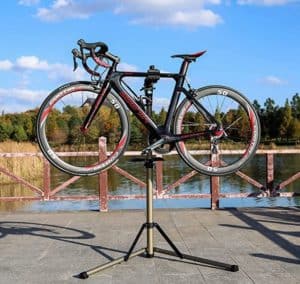
It’s now time to set up your bike, ready for painting. If you have a bike repair stand, hang the bike on it. But if you don’t have it, turn the bike upside down.
Step 7 – Primer Application
The paint must adhere to the bike frame. For that to happen, you’ve to apply an undercoat (what we call a primer).
A primer essentially promotes better paint adhesion, but it also does more. Since it’s the first coat, it offers protection to the bike’s metal frame.
Moreover, it improves your paint’s durability.
While there are so many high-quality primers out there, I fancy the Rust-Oleum 7769502 Enamel Paint Primer.
This paint primer has rust-preventative properties that make it a good bike frame protector. The oil-based formula promises the best paint adhesion by creating a surface that the paint can stick.
It enjoys a 4 hour cure time but promises lasting performance.
Step 8 – Gear Up
It’s best if you protect yourself before painting. So, wear safety goggles, a dust mask, and safety gloves. Once you are geared up, you can go ahead and apply the primary coat.
Step 9 – Start Painting
Here are the general tips for painting your bike:
- Apply a thin first layer gently and give it about 30 minutes
- Do the second coat the same way as the first one
- Give the second coat 30 minutes before applying the last (third) coat

Step 10 – Leave the Bike to Dry
Lastly, leave your bike outside to dry. For the best result, allow the cycle to dry for 24 hours.
FAQs
1. What Can I Use Instead Of Spray Paint?
You can use carbon touch-up paint like the ACDelco GM Carbon Flash WA501Q and primer instead of spray paint. Alternatively, you can use direct-to-metal paint like the POR-15 46804 Top Coat Gloss White Paint if you don’t want to use a primer.
2. What Paint Can I Use To Paint My Bike?
Here are some fantastic paints you can use to paint your bike:
- ACDelco GM Carbon Flash WA501Q – Best Carbon Touch-Up Paint
- POR-15 46804 Top Coat Gloss White Paint – Best Direct-to-Metal Paint
- Krylon 3106 Aerosol Paint – Best Aerosol Bike Paint
3. Can You Hand Paint A Bike?
With the right paint and painting tools, you can hand paint a bike. You can use spray paint or a paintbrush and regular paint to paint a bike.
You can even customize the frame the way you want if you are artistic.
4. Can I Paint My Bike With Acrylic?
Acrylic paint works well on steel, carbon, and aluminum. Acrylic paints are water-based and do not contain any corrosive chemicals. As a result, it’s a decent pick for painting your bike.
5. Can You Paint A Bike Without Taking It Apart?
It’s possible to paint a bike without taking it apart. Just ensure you tape up or cover the areas you won’t be painting.
Remember, you can use painter’s tape, masking tape, or trash bags to cover the parts.
6. How Much Does Painting A Bike Cost?
On average, it cost about $200 to paint a standard bike if you take it to a professional. The cost includes the cost of the paint, tools, and labor.
But if you go DIY, spray paint will cost you about $15-$30, while a primer will cost you about $15-$20. So, you can do everything with a $30-$50 budget.
7. Can You Use Spray Paint On A Bike?
Spray paint allows you to give your bike frame a new coat in a matter of hours. So, yes, you can safely use spray paint on your bike. Besides, there are so many spray paints that are designed specifically for bikes.
8. Can You Brush Paint A Bicycle?
Though it might take you a long time, you can brush paint a bicycle at home. Just ensure you get good metal paint and sand the frame before applying it.
Don’t forget to use a primer as your undercoat to encourage better topcoat adherence.
9. Do You Have To Sand A Bike Before Painting?
If you want the paint, especially the undercoat, to stick, you have to sand the bike frame. So, use high-grit sandpaper to give your bike frame a rough feel before you can start painting.
Closing Thought On Painting A Bike Without Spray Paint:
Now, you know how to paint a bike without spray paint. You can use the guide I’ve shared to give your bike a new and more stylish look.
More importantly, you’ll protect it against rust and cover up the dents and scratches.
Frequently Asked Questions
Can I hand paint a bike?
Yes, indeed! You can definitely hand paint your own bike and take pride in a DIY project. It might seem like a job for a professional, but with the right kind of tools and a bit of time, you are fully capable of transforming your bike with a fresh coat of paint. The result is not just about a new, polished look – it’s about the satisfaction of a custom-made bike by your own hands.
From personal experience, it's quite a relaxing and rewarding activity. Years ago, I decided to breathe new life into my old, rusty bicycle. After gathering all the materials needed – a variety of brushes, some good quality paint and primer, and a lot of patience – I was able to give my beloved bike not only a fresh look but also a personalized touch, which I feel makes every ride even more special.
Can you paint a bike with a brush?
Absolutely. Brush-painting your bike’s frame is indeed a viable method. Naturally, there might be concerns about leaving brush marks on the frame, but with paint that has a high level of fluidity, you can achieve a very durable, sleek finish free of brush marks.
I can recall when, once, I decided to take on the task of adding some artistic flair to my nephew's bike. I picked up a medium-sized brush and a dark blue paint that was almost water-like in consistency. I was initially apprehensive about the possibility of stroke lines staying visible, but as the paint began to dry, those fears quickly dissipated. The resulting look was shades above satisfactory. Though, for a solid finish, two coats might be necessary, which makes it slightly expensive, but depending on your paint choice and budget, it is certainly a feasible option.
How can I color my bike at home?
Coloring your bike at home involves a similar process as painting the bike by brush.
What can I use to paint my bike?
Here’s what you’ll need: a bike (hehe), a sandpaper block of a medium-light grade to sand off any old paint and roughen the surface for new paint, painter’s tape, and a wrench to take off the old parts. Screwdrivers may come in handy depending on the type of screws on your bike, and perhaps a pair of scissors as well.
To protect the area in which you're working, a big, old box can be flattened out and used. In terms of painting materials, a primer spray paint and spray paint in your color(s) of choice will do the trick. A wash rag will be useful for cleanup, and to protect yourself, consider using a painter's mask.
Remember the first bike I painted? I wanted it to match my personality, so I chose a fiery red for the frame and a contrasting black for the rims. It was my first DIY paint job, so it didn't come out perfect, but adding my personal, unique touch to the bike made every ride feel triumphantly personal.