While removing the derailleur is critical in switching from multi-speed to single-speed, there is always the risk of losing the chain tension. To make up for the loss, most cyclists opt for chain tensioners. But, do you need a chain tensioner for single speed?
If your frame features vertical dropouts, you need a chain tension to prevent the wheel from moving about. However, the tensioner is not necessary if your frame contains horizontal dropouts.
Essentially, you don’t need a chain tensioner on horizontal dropouts because you can create tension by only sliding the back wheel.
I’ll explain more about this in a few seconds. My goal is to help you know when a chain tensioner is necessary, how you can fit it, and the options you have.

Now, let’s dig deeper!
Do You Need A Chain Tensioner For Single Speed?
Before I can answer that elaborately, let me talk about the rear derailleur.
One of the rear derailleur principal functions is to manipulate (adjust) the chain tension whenever you shift into a different gear.
That happens through a pulley system that relaxes the chain tension when you shift. So, without this pulley system, it’s impossible to shit, and the chain will slip off at all times.
So, removing the rear derailleur means there is no proper mechanism to outstretch the bike chain.
As a result, it becomes much difficult and even annoying to attain the correct chain tension.
While it’s theoretically possible to adjust the chain tension with half-chain links, the process is frustratingly slow and inefficient, and that’s where a chain tensioner comes in.
So, What Does a Chain Tensioner Do?
Principally, a chain tensioner converts your bike’s vertical dropouts into a single-speed system.
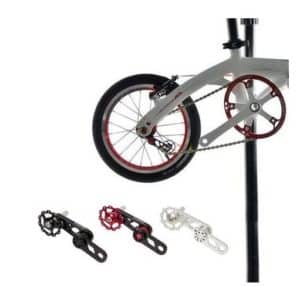
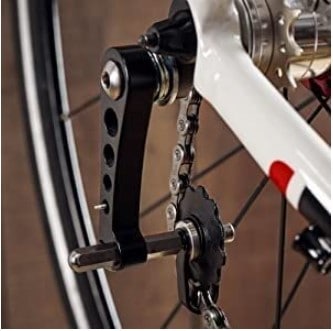
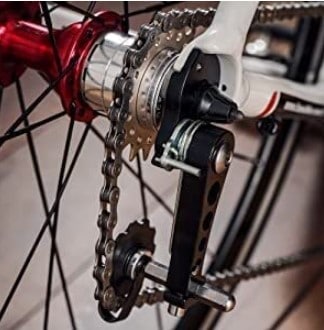
The tensioner, also known as the singulator, attaches to the derailleur hanger to act as a pulley system that outstretches your bike chain and gives it the correct tension.
So, Do Chain Tensioners Work?
Chain tensioners feature either a push-up or push-down spring.
In the case of a push-down spring system, the pulley is inside the bike chain and works by pushing the spring down. In contrast, the pulley system of a push-up spring goes beneath the chain and forces it up.
Nowadays, most singulators employ the push-down spring as it’s compatible with most bike drivetrains.
But still, the push-up system offers the benefit of a more comprehensive chain wrap and a lower chance of a teeth-skip.
The good news is that most singulators allow you to convert from a push-up to a push-down or vice versa by simply swapping their springs.

But Why is a Chain Tensioner Unnecessary for Horizontal Dropouts?
Generally, bike frames featuring horizontal dropouts allow you to create chain tension by sliding your rear wheel back.
Doing so eliminates the need for a singulator (chain tensioner)
Usually, there are two categories of horizontal dropouts; track ends and semi-horizontal dropouts.
Let’s start with track-end dropouts;
Track-end or rear-facing dropouts are present on track bikes, dirt jumpers, BMX, and some MTBs.
If you want to convert your geared drivetrain into a single-speed, a track dropout offers you more convenience.
They are also cheaper and safer, eliminating the need for chain singulators.
Note, however, that while track dropouts don’t need a chain tensioner, you can still use a chain tug, which allows you to pull back the rear wheel.
Most cyclists confuse the device (the chain tug) with a chain tensioner, but the two are different.
Not only does the chain tug prevents the back wheel from getting into the dropout, but it also enables you to readjust your bike’s chain tension.
Now, let’s talk about the semi-horizontal dropouts;
You can find semi-horizontal dropouts on vintage bikes.
Frames with the dropouts are essentially meant for bikes with rear derailleurs and not derailleur hangers.
Most cyclists employ them for single-speed conversions as they easily allow them to slide back the axle and adjust the chain tension without needing a tensioner.
So, they essentially mimic a rear derailleur’s t-pulley system.
Sadly, you cannot use chain tugs on semi-horizontal dropouts.

What’s the Advantage of Single-Speed Conversions?
So, why go through all the stress of changing your geared drivetrain into single-speed? Why spend money on a single-speed chain tensioner?
Well, here are the advantages of a single speed with chain tensioner:
Low-cost bike – A single-speed conversion allows you to have a decent bike frame at a fraction of the cost, and you get to ride smoothly. It generally reduces maintenance costs.
- Hassle-free back wheel removal – A single-speed conversion lets you take the back wheel without having to remove the chain from the back cog.
- A vintage bike – Single-speed conversions give your bike a vintage look. That’s important if you have a hybrid or beach cruiser, as they naturally have a vintage look.
- Bike safety – Let’s face it; not many can bother stealing a weird-looking or old bike. A single-speed conversion gives your bike frame an aged look that deters thieves.
- Long fenders installation – Since-speed conversions make it easy to install full-coverage fenders that offer you more mud protection.
What’s The Best Chain Tensioner For Single Speed Conversion?
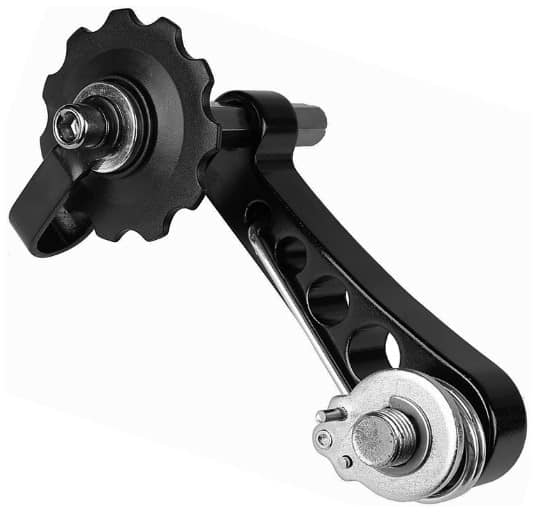
There are many chain tensioners for single-speed that you can go for. One of them is the CyclingDeal Bike Single Speed Chain Tensioner.
It allows you to run your geared bike as a single-speed bike without doing so many modifications.
The chain tension features 3/32″ single chains and multi-speed bike chains. It’s made of aluminum, thus pretty lightweight, and is compatible with SRAM and Shimano hubs.
The chain tensioner is attached to the derailleur hanger, and it features an adjustment function that allows you to adjust the chain tension.
The only issue is that it doesn’t suit oval bike chains and smaller cogs.
Overall, the chain tensioner is decent in performance and comes at a reasonable price. It generally suits MTBs and road bikes.

How To Install Single Speed Chain Tensioner
While the process of installing a single-speed chain tensioner may vary between singulators, here’s a general guide:
- First, remove the axel-nut on the drive-side
- Then place the chain tensioner gently against the face of the rear dropout
- Return the axel-nut as it was and tighten it
- Move the wheel in the dropout before adding some tension to the chain
- Ensure you center the rear wheel in the frame as you adjust the tension using a chain tensioner screw
- Lastly, retighten the axel nut to re-secure them
How About DIY Chain Tensioners?
Given that a decent chain tensioner costs about $30 or more, you may choose to cut on cost by making one at home.
Be wary, nonetheless, that you may not make a perfect tensioner.
The concern aside, here are the basic steps for making a chain tensioner from scratch:
- Assemble a Philip screwdriver, scissors, small garden PVC hose, bike reflector, and zip ties
- Take the light reflector apart and take out the bolts and nuts
- Take the garden hose and position it on the reflector’s round part
- To ensure it fits well, put it in hot water or pass a light frame but be sure not to burn it
- If the hose is too big, trim it to ensure it only occupies the reflector’s circle area
You now have the DIY chain tensioner that you can zip-tie into the chainstays.
What If I Don’t Have a Chain Tensioner?
While nothing replaces a chain tensioner, you can still give your bike the correct tension without it. I’m suggesting you adjust the screws on your existing derailleur.
Here are your options:
a. Use Limit Screws
Here are the steps to follow:
- Identify the shifting cable, which goes into the rear derailleur and remove it.
- Adjust the limit screws you find on the rear derailleur to properly align the drivetrain’s pulley system with your rear cog.
- The above step allows you to straighten the chain before you can fully install it. Remember, if the chain is not straight, there would be inadequate power output that will result in unnecessary strain on the drivetrain.
- Now fit the chain but ensure you bring both ends together until you can position the t-pulley correctly forward.
Remember, you can always shorten or lengthen (by adding links) the chain if you feel that its tension is not okay.
b. Use Limit Screws and Derailleur Cable
The only difference between the first method and this one is that you also use a cable. That is because the derailleur cable offers you more adjustment.
I’m assuming that the derailleur cable is only cut at this point but not removed. In that case, you can use it to adjust the pulley.
Of course, you also have to adjust the barrel adjuster, given that the cable slides into it.
Also Read:
Do You Need A Chain Tensioner For Single Speed? Closing Thought:
Generally, if your frame contains vertical dropouts, a chain tensioner is necessary. But if it’s horizontal dropouts, then you can do without it.
The tensioner’s goal is to help you have the most from your single-speed.
Frequently Asked Questions
Is a chain tensioner a must for a single-speed bike?
The simple answer is yes, a chain tensioner is a must for a single-speed bike that doesn’t have horizontal dropouts. The chain tensioner works to maintain the correct tension in the bike chain, helping the bike function optimally. It’s particularly important if your ride is uneven or bumpy, as the chain can easily become loose. As someone who enjoys off-road biking, I can attest that a chain tensioner is an indispensable part of a single speed bike. In my experience, it drastically reduces instances of chain slips, providing a smooth and enjoyable ride.
Should a chain tensioner be used on a fixie?
Absolutely, a chain tensioner can be a crucial addition to a fixie, especially when the chain is longer than necessary. A loose chain can easily come off the gear, jam the wheel, and cause uncontrolled skids—something I’ve unfortunately experienced first-hand. It was a regular commute day, and my chain slipped off, resulting in a skid that could’ve been dangerous had I been moving at a higher speed. Since then, I use an old derailleur as a chain tensioner on my fixie. However, a pulley-type chain tensioner should be avoided with fixed gears.
What’s the best way to tension a single-speed bike chain?
Though the specifics of the procedure might vary to a degree based on the bike model, the general approach involves moving the rear wheel further from the front. By increasing the distance between the crankset and the rear wheel, you can apply adequate tension to a loose chain. Remember to ensure that the wheel remains aligned with the bike frame for optimal performance. Check out this detailedYouTube tutorial for a step-by-step guide on how to tension a single-speed bike chain.
Why does my bike chain keep coming off my single-speed bike?
There could be multiple reasons why your bike chain isn’t staying put. One possibility is that the chain is worn out or has a bent or stiff link. Dirt accumulation might also hinder the chain’s smooth movement along the chainring. I recommend visual inspection for immediate insight into the issue. In my experience, a bent chainring or a faulty chainring tooth could also be the culprit, so don’t forget to examine those. Efficiency in single-speed bike performance relies heavily on the condition of the chain, chainring, and chainring teeth.