Tubeless tires have become so popular nowadays, and it doesn’t surprise that many road bike owners fit them. Today, I’ll explain how to install tubeless tires road bike.
Here are the exact steps you have to follow to install tubeless tires on road bikes:
- Remove the wheel
- Clean the rim bed
- Apply the tubeless tape
- Patch up the tape
- Install the Schrader valve
- Fit the tubeless tire
- Apply tubeless sealant
- Inflate the tubeless tire
But before we can start with the process on how to set up tubeless tires, let’s answer these two critical questions:
- Are tubeless tires better for road bikes?
- What do I need to install tubeless tires on my road bike?
Are Tubeless Tires Better for Road Bikes?
Generally, tubeless tires are known to resist pinch flats. In that case, the risk of suffering a flat tire is minimal.
That also means you can ride on lower pressure, which significantly improves your safety as you enjoy optimal traction. On the flip side, tubeless tires also allow you to ride on a high-pressure minus the risk of a blow-out.
Tubeless tires also suffer lower internal friction and that translate to lower rolling resistance. As a result, the tires move much faster on the road. Furthermore, reduced pinch flat means you get to ride more comfortably over a long distance.
So, there is no doubt that tubeless tires are best for road bikes. Their primary concern is their sidewalls which can become a nightmare if punctured. You’ll have to replace the entire tire if it happens.
The other concern is that fitting a tubeless tire is not as easy as a tubed option. Lucky for you, that’s where I come in. I’ll demystify the process for fitting tubeless tires on the road bike to make it easy for you.
How to Install Tubeless Tires Road Bike: The Must-Have
The following items are a must-have before installing tubeless tires on road bikes:
- Tubeless Tape
This is an airtight tape that seals up joints and spoke holes on the rim. Confirm that the tubeless tape is road bike compatible.
- Tubeless Sealant
This is a milky latex-based liquid you use to seal holes on the tubeless tires before even a puncture occurs.
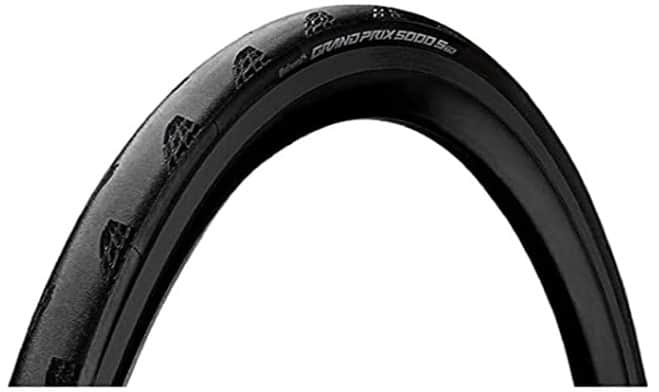
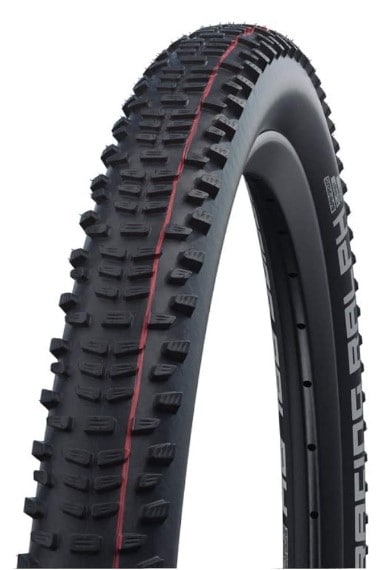
- Tubeless Tire
Since we are discussing how to mount tubeless tires, you need the best tire, and I recommend SCHWALBE Pro One Evolution Tire (View on Amazon).
The tire comes in a slick, foldable design to promote a smoother ride and promises more flat-protection. Moreover, it fits easily, something you want as a DIY fan.
- Presta Valve
Get the Presta valve and ensure it has a noticeable core for easy inflation and comfortable sitting.
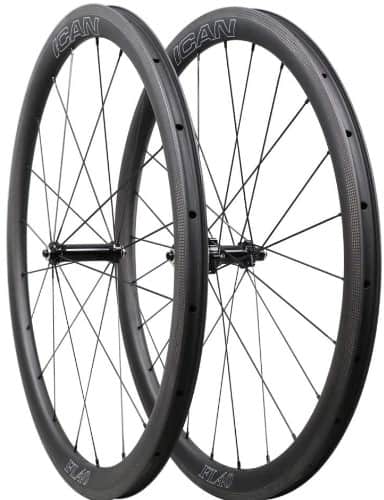
- Tubeless-Ready Rimes
Though you may not notice it, tubeless-ready rims are different from regular rims. The exemptions are those that comply with the Universal System Tubeless (UST) standards.
Generally, a tubeless-ready rim should be tape-sealable, and a good recommendation is the ICAN FL40 Carbon Rod Bike Tubeless-Ready Rim (View on Amazon).
The rime promises more support and stability for your road bike. Its shape makes your bike more aerodynamic. Generally, this is the best bed for a 25/28mm tubeless tire.
- Other Essentials
You also need the following to install tubeless tires road bike:
- Scissors that you use to cut the tape
- Methylated spirit to clean off glue and sealant deposits from your rims
- A small screwdriver for poking valve holes
- A syringe for applying the sealant
- Charge pump for inflating the tire
How To Install Tubeless Tires Road Bike in 8 Steps
Step 1 – Remove the Wheel (Present)
Unless your road bike’s rims are UST-certified, you’ll have to remove the whole thing and fit a tubeless-ready rim.
So, start by removing the wheel from the road bike. If the rim is UST certified, go ahead and remove the tube and tire to replace it with tubeless option.
In case the rim is covered by a plastic strip, remove it before proceeding to step 2.
Step 2 – Clean the Rim Bed
Before you can apply a tubeless tape to the rim bed, you must clean it (the rim bed) well.
Ensure you clean off all the residue and glue. Ordinarily, soapy water will do. But since the adhesive is often stubborn, consider using methylated spirit to wipe it off.
You should avoid corrosive chemicals as they can damage the rim, especially carbon rims.
Step 3 – Tape Down The Rim Bed
Once the rim bed is clean and residue-free, it’s time to tape it and continue with the tubeless tire install. Here are the steps to follow:
- Start with the area directly opposite the tube valve hole
- Hold the tape down and apply it about 6-8 inches
- Ensure the keep the tape central on the rim bed and very tight
- That’ll allow the tape to hold in place
- You can rotate the rim as you apply the tape further on the rim
- Do it nicely as you avoid stray edges
- Once you get to the tape’s endpoint, overlap it by about 4 inches
- Then cut the tape before you firmly press it down with your thumb
Step 4 – Patch Up the Tape
In case you damage the tape during the application on the rim bed, patch it up.
Consider re-taping the already-taped rim bed, but ensure you do it thickly to avoid later disappointments.
Step 5 – Fit the Schrader Valve
If the rim is well taped, then the next thing is to fit the Schrader valve. Here’s what to do:
- Start by locating the rim’s valve hole and then push it inside out.
- Then make a small hole using the small screwdriver and then put the Schrader valve through it.
- Push it (the valve) down using your valve
Step 6 – Fit the Tubeless Tire on the Rim
When it comes to fitting the tubeless tire, the process is similar to regular tubed tires. But since it has a tighter head, it can be slightly tricky.
Remember, however, that you don’t have to go all strong when you install tubeless tire. That’s because it could damage the tubeless tape and that’ll force you to repeat step 3.
Once you fit both sides of the tubeless tire on the rim, massage it, and set it in place.
Step 7 – Apply Tubeless Sealant
Now it’s time to seal any existing holes on the tire. So, go ahead and apply the tubeless sealant.
You have two ways to go about it. You can add the sealant to the tire before you fit entirely it. That means combining this step with step 6.
Alternatively, you can add the sealant via the Schrader valve. In this case, you’ll have to use a syringe.
Step 8 – Inflate the Tire
Lastly, confirm that the tubeless tire is sitting before you can pump it up.
A few quick air blasts should be able to pop the tubeless tire in place. In case it’s only one side that sits correctly, continue pumping until the whole tire sits correctly on the wheel.
Ensure you pump the tire to the right pressure level. Once you succeed with that, detach the pump head before replacing the valve core.
Ultimately, bounce the pumped tubeless tire on the ground to ensure it’s well-inflated. Then reattach the wheel and repeat the eight steps on the other wheel before taking your road bike for a spin.
Related:
How To Adjust Front Derailleur On Mountain Bike
Concluding Thoughts on How To Install Tubeless Tires Road Bike
Learning how to install tubeless tires road bike is essential if you want to switch from tubed to tubeless. Looking at its excellent benefits like puncture-proof, fast-riding, and more traction, tubeless is the way to go.
Frequently Asked Questions
How do you put tubeless tires on a road bike?
Based on my extensive cycling experience, fitting a tubeless tire on a road bike isn’t as big a task as you may think. The process begins with a clean and inspected rim. You’ll want to make sure there are no burrs or sharp edges that could potentially damage your new tubeless tire. Next, apply a layer of tubeless rim tape, ensuring it’s centered over the rim well and firmly pressed against the rims. Then, insert the tubeless valve through the rim’s valve hole, tighten it, but avoid overtightening. Now it’s time to mount one side of your tire onto the rim and then add the sealant. Once the sealant is in, mount the second side of the tire onto the rim. You may need a tire lever to help with this step, but be gentle to avoid any damage. The final step is inflating your tire. Depending on your rim and tire combination, you may need a burst of air from a CO2 cartridge or compressor to fully seat the tire against the rim.
How often do you need to put sealant on tubeless tires?
As an experienced cyclist, I would say the frequency of adding sealant to your tubeless tires really depends on several factors including your riding style and conditions. However, a good rule of thumb that I follow is checking the sealant level every 2-3 months for general maintenance. Also, remember to add more sealant if you’re planning a long ride or if it’s been awhile since your last sealant check. The sealant does eventually dry out, so periodic checks and top-ups are essential for ensuring your tires are ready for a smooth ride.
Do tubeless tires need rim tape?
Evidently, there’s a common misconception regarding the need for rim tape with tubeless tires. Let me clear that up – not all tubeless setups require rim tape. In fact, tubeless-specific rims are designed to create a secure seal without the need for tape. This makes swapping tires a hassle-free process as you won’t have to worry about re-taping. So, if you’ve got a tubeless-specific rim, the only perforation you’ll have to deal with is the valve hole. However, it is important to note that this may not be the case with tubeless-ready rims, those often do require tape to ensure a proper seal.
How much air do you put in tubeless road bike tires?
Here’s a helpful piece of advice to all cyclists – never over-inflate your tires! Over-inflation can lead to a harsh ride, more punctures and even kill the advantages of going tubeless. According to my years of cycling experience and the advice I’ve received from other experts, your tire pressure should depend on the width of your tire. For instance, if you’re running 25-28mm tyres, you should never inflate past 100 psi. For a 30mm tire, deflate to 70 psi, and if the width of your tire exceeds 46mm, go with 35 psi.